
Trim Decisions…
One of the more important decisions that we probably have made is our trim decisions. This included decisions regarding cabinets, door/window moldings, crown moldings, and baseboards.
To me, the key to making something ordinary become something extraordinary is in the details, and that is exactly what I was hoping to achieve with our cabinet decisions. Besides my kitchen inspirational files, my collection of bathroom and cabinet photos was probably the next largest. Before we did our official “trim walk” with Jeff Paul (our builder) and his crew, Lucia Harness (my designer) and I met to look through and talk about my “inspiration pictures”. She and I spent many hours discussing elements such as the style of the room the cabinet would be going into, necessary storage, drawers, doors, stain finishes, paint finishes, glass, and molding details.
For each room, we would discuss and then Lucia would “work her magic” and redraw my inspiration into something that worked for the space and looked fabulous. She then made up packets for each cabinet piece and had copies for each person at the “trim walk”. These packets included my original inspiration picture and the revised drawing for each room. Lucia’s foresight in making these packets made our “trim walk” not only very organized, but also go more efficiently.
Jeff builds all his cabinets “on site”. “On site cabinets”, for those of you who may not be familiar with the term, mean they are built exactly to the space wanted. A big pro for “on site” cabinets is there are no fillers used and thus no wasted space. A possible con to “on site” vs. “factory built” cabinets is sometimes the wood quality used is not as desirable or the paint/stain finish is not as good as “factory built”. However, in our case we have been nothing but extremely pleased with all the trim work Jeff’s crew did for our house project. You can see some of the trim work, in the photos I’ve included below, that were taken during the trim phase in our building process.
Study/Library Inspiration Photo:
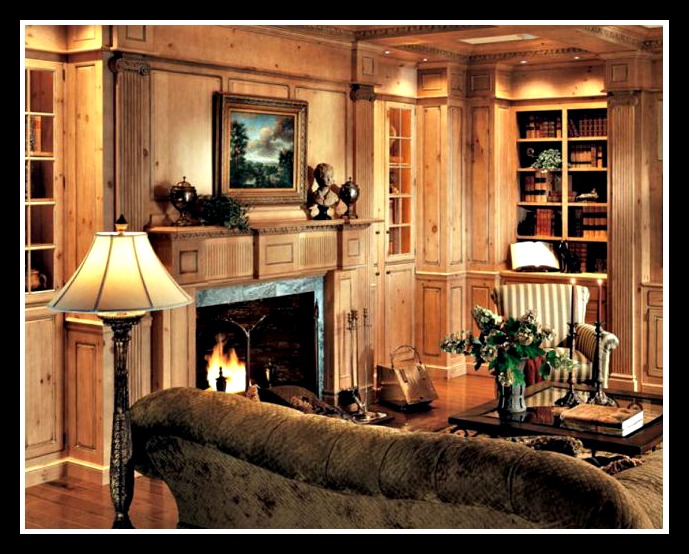
Photo credit: WoodMode Fine Custom Cabinetry
This was my inspiration picture for our study. The cabinetry is Made by Wood-Mode Fine Custom Cabinetry. I had a copy of this photo in my file for many years from an old Wood-Mode catalog. I fell in love with the pine wood and the glass cabinets. I could see myself curling up in a room like this one with a good book in front of a fire.
Study/Library Trim Work

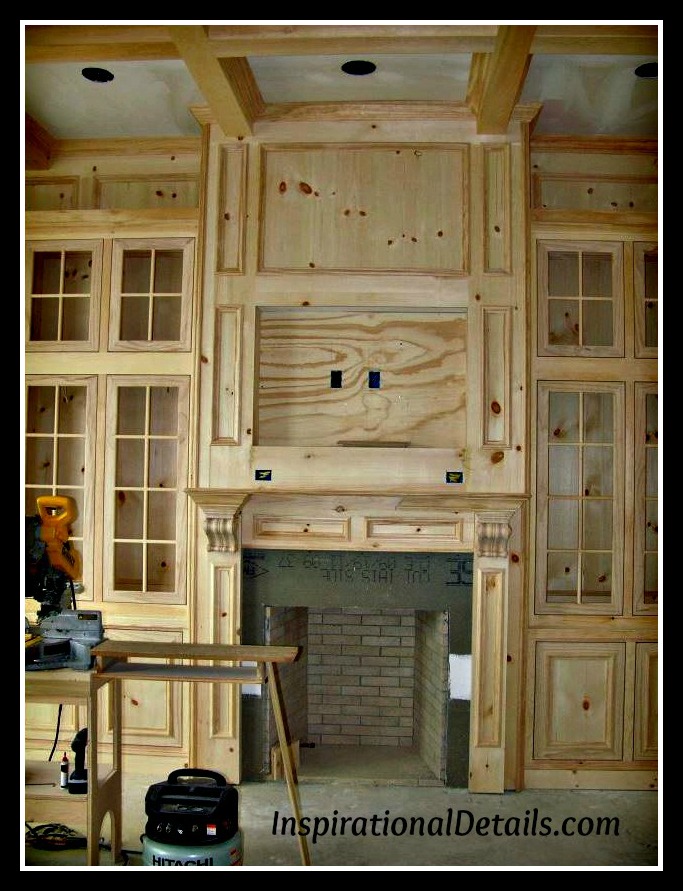

The above pictures were taken during the trim stage of our study. I think Jeff’s trim crew pretty much “nailed” my inspiration photo!
Other Study/Library Photos for Inspiration :

Photo credit: John Kraemer & Sons
This warm and inviting study was built by John Kraemer & Sons for their project in Lake Minnetonka’s Wayzata Bay.

Photo credit: Houzz
Design by:
Norris Architecture
This study by Norris Architecture is just spectacular.
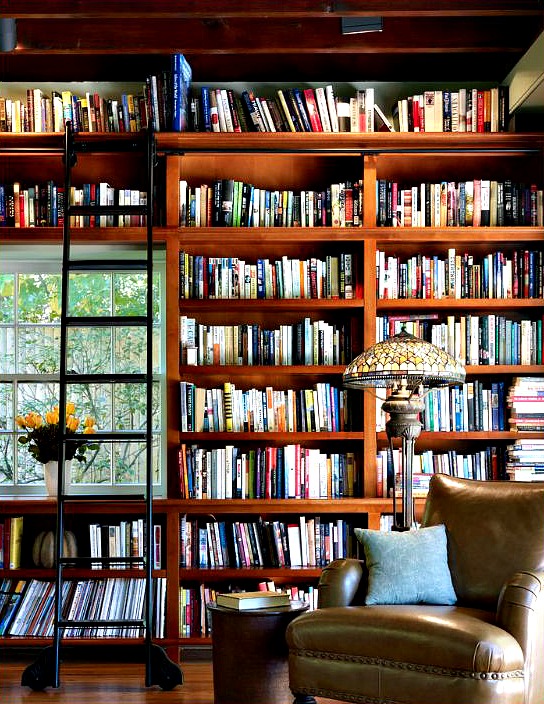
Photo credit: Houzz
Design by:
Krieger Architects
I love when the books stretch all the way to the top.

Photo credit: Houzz
Deisgn by:
Maria Schrank Interiors
A good-looking rolling ladder is always a plus in a study.
Pantry Cabinet Trim Work:

This is one of our beautiful glass doors in our Pantry. I have always been attracted to this gothic mullion door style.

This is a close up of one of the doors. I think even Jeff and his team were surprised & impressed by the workmanship that his trim crew had done with some of our cabinet details.
Photos for Inspiration
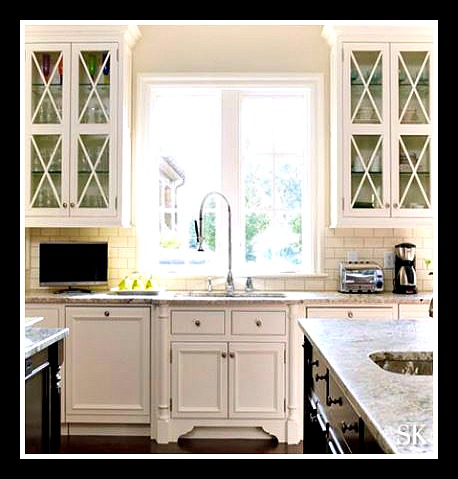
Photo Credit: Suzanne Kasler
How great are these glass-fronted cabinets designed by Suzanne Kasler? I love the mullions in the shape of an X. They give the cabinets a delightful old-fashioned look.

Photo credit: Elements of style blog
But … O-M-Gosh, Jeff and his trim crew are so lucky I hadn’t seen this inspiring picture before I made my trim decisions because I absolutely love the nail head detail that these cabinets have – how extraordinary is that?!! I have no idea how much something like this costs, but I would guess it is very expensive.
Bath Cabinet Trim Work:

This cabinet is in one of the bathrooms. There is an exquisite molding piece in the center of each of the Xs. I plan on putting antique mirrored glass in the door panels. I would also like to wallpaper the walls in this room.

This photo is one of the other baths. I really wanted a bowed front. I also added a tiny bead trim detail around each of the drawers.

A bath cabinet with a front curvature. It has two tall doors in the center of it. This cabinet has a feminine feel to it.

This is a close up of a door front for a bath linen cabinet. I plan on putting clear glass in the front of this panel.
Photos with Unique Cabinet Details for Inspiration
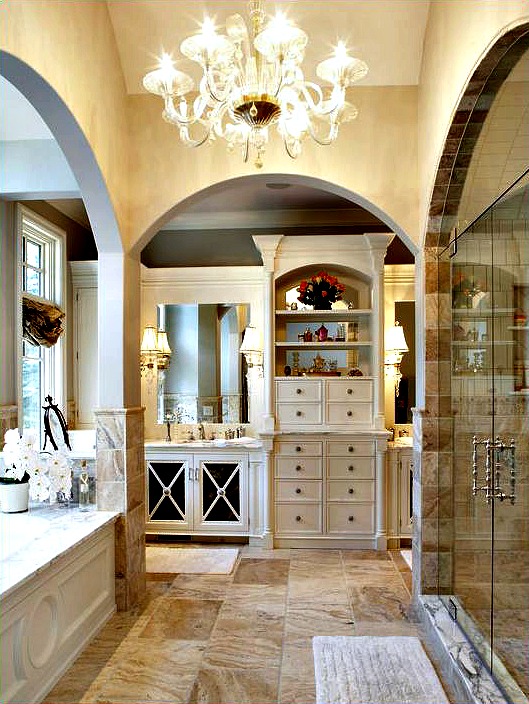
Photo credit: Houzz
Design by:
Hendel Homes
This gorgeous bathroom was my inspiration for the bath cabinet. The bathroom was built by Hendel Homes for their Minnetonka Lakeshore Lifestyle project.

Photo credit: Kitchen and Bath Ideas Magazine
As you can see in the above photo, this kitchen island molding detail has a very similar feature to the one in our bathroom cabinet.

Photo credit: Houzz/
Tiffany Eastman Interiors
This beautiful, mirrored armoire cabinet is from Tiffany Eastman Interiors’ Greenwich Penthouse Project. I just love the octagonal shape and find the design so interesting.

Photo credit: Houzz
Design by:
Daniel Contelmo
Architects
A great looking bath with a bowed out front that comes straight across which gives the cabinet a much more traditional feel.

Photo credit: Houzz/
Rugo/Raff Ltd. Architects
I find the look of this cabinet (& bathroom) exceptional. I love the masculine feel of the bowed front and think the wood species is just beautiful. This cabinet was part of the Lakeview Residence Project by Rugo/Raff Ltd. Architects in collaboration with Tom Stringer Design Partners.
Sitting Room Niche Trim Work

This is a photo of a niche in our sitting room. I also added additional pretty trim molding pieces to the top of it. I plan on having the niche faux painted and glazed. I will be using candles inside of it.
Inspiration Photo

Photo credit: Tuscan Style Magazine
I fell in love with this small wall fireplace when I first laid my eyes on it. This fireplace is in a private residence that was featured in “Tuscan Style Magazine”. I explored several options as to how to put a similar one in the house. I decided on trimming out the space which kept the costs to a very reasonable amount.
Last Trim Work Photo…

This is a photo of a worker from Jeff’s trim crew installing a piece of crown molding. I found it fascinating to watch him – he would hold up a large piece of molding in one hand and use his pneumatic nailer (hammer) to secure it to the wall all while standing on the ladder.
Final Words:
I hope you have found some inspiration from the photos from our house project and especially from some of my favorite design photos. Make your ordinary into something extraordinary!


Pingback: My Study/Library Inspiration: Before & After | Inspirational Details
Thank you very much!